 |
|
|
|
Installing CP, DP or SP Series Boards
The following instructions provide general installation instructions for Density Series compatible server boards. Refer to the appropriate manual supplied with the processor board for detailed configuration instructions.
CAUTION! Group power must be off before installing any Cubix processors, peripheral boards, or third-party peripheral cards. Failure to follow this warning may result in damage to the Density Series system and boards being installed. |
1. At the front console, select and turn power off to the group location where you intend to install the server board. (Click here to learn how)
2. If a hard-drive is installed in the group hard drive slot, remove the hard drive and the CP, SP or DP board.
3. Configure the switch and jumper settings on the board being installed.
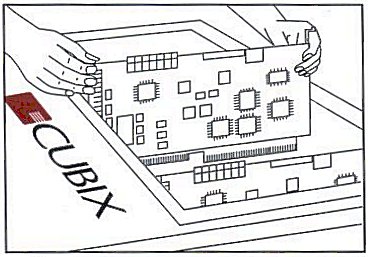
4. Insert the board into the group slot ensuring the card interface tabs are aligned with the center of the slot.
5. Seat the processor card into its slot by firmly pressing on the top of the card with the palm of your hand.
6. Install the hard drive assembly into the appropriate hard drive bay located in the front of the Density closure (Figure 2). The hard drive assembly will fit into the hard drive interface of the I/O board. Make sure it is seated.
7. At the front console apply power to the processor group.
Systems | Circuit Boards | Other Products | Software | Hardware Identifier
Other Vendors | Technical Notes | Downloads | Search | Support Home Page
This document, and all
Web Site contents, Copyright ©
2000 by Cubix Corp., Carson City, NV, USA.