 |
|
|
|
Replacing a Density
System 1200
Floppy Disk Drive
Floppy Drive Replacement
Remove the top front cover of the chassis by loosening the two rear screws and removing the two front screws (figure 1).
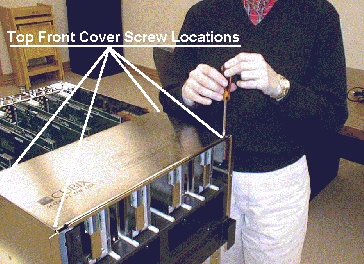
Figure 1, Top Front Cover Removal
Remove two screws securing the floppy disk drive assembly plate to the disk drive bay (figure 2).
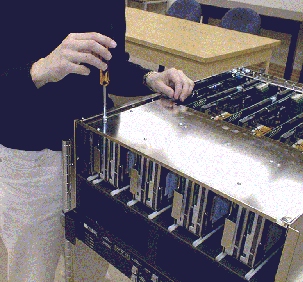
Figure 2, Removal of floppy drive assembly securing screws
Slide the floppy drive out of the hard drive chassis enough to expose the rear connectors (figure 3).
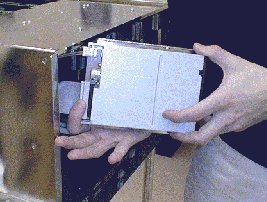
Figure 3, Removal of Floppy Disk Drive Cables
Disconnect the floppy ribbon and power cables from the rear of the floppy drive assembly.
Remove the four screws securing the floppy drive to the mounting assembly.
Reverse the steps above to install the replacement drive.
Systems | Circuit
Boards | Other Products | Software | Hardware Identifier
Other Vendors | Technical Notes | Downloads | Search | Support Home Page
This document, and all
Web Site contents, Copyright ©
2000 by Cubix Corp., Carson City, NV, USA.