 |
|
|
|
Expansion
Subsystem
Chapter 6 - Field Replaceable Units
Interface Boards and Cable
ISA Backplane
Disk Drive
Auxiliary Junction Panel
Power Supply
Power Distribution Panel
Fans
The Cubix Expansion Subsystem interface board (A3480) and the host interface board (A3470) may both be replaced as follows:
1. Turn off the power to the Expansion Subsystem.
2. Turn off the power to the host system.
3. Disconnect the interface cable from both the subsystem and the host.
4. Remove the interface boards.
5. Install the new boards and cable as described in Chapter 3 -- Installation and Operation.
The Cubix Expansion Subsystem contains a passive 16-slot ISA backplane.
Replacement Instructions:
1. Remove power from the Expansion Subsystem.
2. Remove the top cover.
3. Carefully disconnect all cables from all installed boards. Note the location of each board, and remove all boards from the backplane.
4. Remove the nine power supply leads from the backplane by loosening the nine securing screws. Be sure to note which lead is connected to which screw.
5. Remove the screws securing the backplane to the unit.
6. Remove the backplane.
7. Replace the backplane and reassemble in reverse order. Take care to replace the boards and wiring exactly as they were installed in the original backplane. When reinstalling the ground screws, apply pressure to assure a solid ground connection is established.
When adding a disk drive, install the drive in the position closest to the board the drive will service. Installation/Replacement Instructions:
1. Shut power off to the Cubix Expansion Subsystem.
2. Disconnect the A.C. power cord from the rear on the rear I/O panel.
3. Remove the unit covers.
4. Remove the top hold-down bracket securing the disk drives.
5. If replacing a drive, disconnect the power connector and the ribbon cable from the drive.
6. Remove the drive by lifting upward. Then remove the four locating screws and spacers from the drive. Install them onto the new drive.
7. Install the new drive assembly into the correct drive slot.
8. Connect the drive power and data cables. Connect the data cable directly to the board and connect the power cable to the power source on the power distribution panel. These connectors are labeled 1 - 8.
9. Follow the instructions in reverse order to reassemble.
Installation Instructions:
To install an auxiliary junction panel:
1. Remove power from the Cubix Expansion Subsystem.
2. Remove the nine screws securing the blank panel at the top of the rear I/O panel.
3. Using the same screws, attach the auxiliary I/O panel to the rear I/O panel.
To install the Cubix adapter boards into the auxiliary junction panel:
1. Using the screws on the connector housing on the Cubix I/O adapter board, attach the adapter board to the auxiliary junction panel directly above the processor card it will service.
2. Attach the I/O adapter board to the internal header on the Cubix processor board. Refer to the documentation provided with the processor board for installation instructions.
The 350 watt power supply in the Cubix Expansion Subsystem may be replaced by carefully following the steps below.
Replacement Instructions:
1. Turn off power and disconnect the power cable from the subsystem.
2. Disconnect all cabling from the back panel of the subsystem.
3. Remove the subsystem from the Cubix Cabinet and place it on a sturdy work surface.
4. Remove the four screws from the panel on the right side of the subsystem. The power supply is fastened to this side panel.
5. Loosen the twelve screws to disconnect the D.C. output wires at the top of the supply.
        a.      ORANGE from V1+
        b.      ORANGE from V1+
        c.      ORANGE from V1+
        d.      GREEN from V1-
        e.      GREEN from V1-
        f.      GREEN from V1-
        g.      GREEN Jumper from V2-
        h.      BLUE from V2+
        i.      BLACK from V3-
        j.      GREEN Jumper from V3+
        k.      WHITE from V4-
        l.      GREEN Jumper from V4+
6. Remove the four screws securing the power supply mounting plate to the subsystem. Remove the power supply and mounting plate.
7. Remove the four screws securing the power supply mounting plate to the back side of the power supply heat sink.
8. Attach the power supply mounting plate to the replacement power supply.
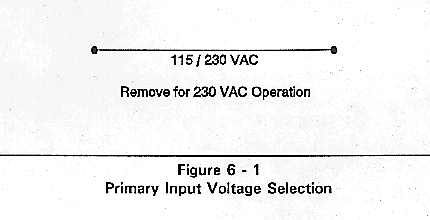
9. The power supply has a jumper to select either 115 VAC or 230 VAC input power. This jumper is located inside the power supply on the end of the printed circuit board opposite the terminal strip. The white jumper wire is clearly marked as illustrated in Figure 6-1
10. Follow the instructions in reverse order to reassemble.
Replacement Instructions:
1. Turn off power and disconnect the power cable from the subsystem.
2. Remove the subsystem top cover to gain access to the power distribution panel.
The panel is located on the right side of the processor bay, behind the disk drive supports and in front of the processor card guides.
3. Disconnect the following cables from the power distribution panel:
   a.      4 wire cable connected to Input.
   b.      2 wire cable from the front panel illuminator connected to Lamp.
   c.      2 wire cable from the 12V load resistor connected to Fan.
   d.      2 wire cable from the speaker connected to Speaker.
   e.      2 wire cable from the battery connected to Battery (if battery is installed).
   f.      4 wire power cable from tape and disk drives.
   g.      4 wire cable from BC Series processor board.
4. Remove the five screws securing the power distribution panel to the mounting plate.
5. Replace the power distribution panel and reassemble in reverse order.
The Cubix Expansion Subsystem contains two fans. The top fan is located on the swingout metal bracket, and the power supply fan is located on the rear of the subsystem. Replacement Instructions:
To remove the fan mounted on the top swingout panel:
1. Turn off power to the subsystem.
2. Remove the top cover.
3. Loosen the fan cable by clipping the tie wraps.
4. Remove the fan cable from its connector.
5. Remove the fan from the top panel by removing the four bolts and nuts.
6. Install the replacement fan and reassemble in reverse order.
To remove the fan mounted on the rear of the subsystem:
1. Turn off power to the subsystem.
2. Remove the top cover.
3. Gain access to the power supply by removing the four screws securing the right side panel. Remove the power supply.
4. Remove the fan cable from its connector J3 located in the 16-slot master interface board.
5. Remove the fan from the rear of the subsystem by removing the four screws and nuts.
6. Install the replacement fan and reassemble in reverse order.
This document, and all Web contents, Copyright © 1997
by Cubix Corp., Carson City, NV, USA.