ERS/FT II
Hard Drive Installation (3.5 " Drive)
1. For each disk drive (HDD) being installed, verify that a 3.5" HDD Installation Kit is available. These kits may be purchased from Cubix Corporation. Each kit includes:
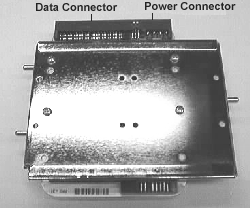
2. Using the mounting screws, attach the drive mounting bracket to the drive as shown in figure 1.

Figure 1 - H/D Mounting Plate
3. Turn power off to the group containing the BC or DP Series motherboard where the drive is to be installed.
4. If a Cubix data highway cable is connected via the IES IN connector on the rear I/O panel of the system, disconnect the data highway cable. This is to prevent BCVision from turning a powered down group back on during this installation procedure.
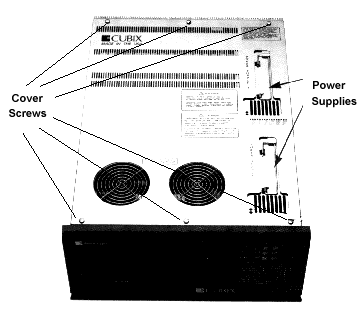
5. Remove the system's top cover:

Figure 2 - ERS/FT II Top Cover
6. Lift the fan panel to access the Drive Bay.
7. Remove the drive retainer bracket:
8. Connect the hard drive power cable to the backplane.
CAUTION!
The drive power cable must be attached to a backplane drive power connector that resides in the same group with the processor that the drive is to service.
9. Connect the data cable to the processor (BC or DP Series board) that the drive is to service.
Note! Pin 1 on the ribbon cable (indicated by a colored stripe) must be attached to the end of the connector closest to the front of the system.
10. Seat the drive into the disk drive bay. The side of the drive mounting bracket with two posts should be pointing down.
11. Routing the power cable under the multiplexor, connect the other end of the cable to the drive.
12. Routing the data cable under the multiplexor, connect the other end of the cable to the drive.
Note! Pin 1 on the ribbon cable (indicated by a colored stripe) must be attached to the end of the connector closest to the power connector.
13. Replace the drive retainer bracket, making sure that the poles on the tops of each drive mounting bracket are aligned with the holes in the retainer bracket.
14. Secure the retainer bracket using the two quarter turn fasteners.
15. Close the fan panel.
16. Replace the top cover and secure with the quarter turn fasteners.
17. If the Cubix data highway was disconnected, connect it back to the subsystem.
18. Apply power.
Systems | Circuit Boards | Other Products | Software | Hardware Identifier
Other Vendors | Technical Notes | Downloads | Search | Support Home Page
This document, and all
Web Site contents, Copyright ©
2000 by Cubix Corp., Carson City, NV, USA.