![[SJF Logo]](../images/sjflogo.gif)
The driver, which was for NT 3.51, was about 30,000 lines of C++ and included several parts that are described below. At no time during the development of this driver did I ever have an actual printer at my office: all my testing was done either with PostScript output to my HP LaserJet or to a program that simulated the printer's raster command set. The customer reported that the driver worked the first time when tried on a real printer.
Sadly, this driver was completed just as NT 3.51 was reaching the end of life, and a port to NT 4.0 was not really possible. NT4 moved graphics drivers (for video and printers) from user space into the kernel, and the whole driver architecture changed as well. Restrictions such as "no native floating point" and "no multiple threads" were among the many obstacles to an NT4 version.
The main components of this driver were:
As with all printer drivers, this one had a GUI setup component that was visible to the user at print time. These screen shots show the design of the dialogs and reveal the underlying driver functionality.
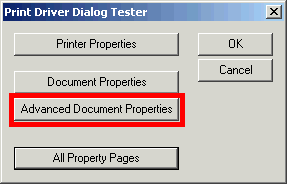
For this section we'll be examining the "Advanced Document Properties"
portion of the printer GUI.
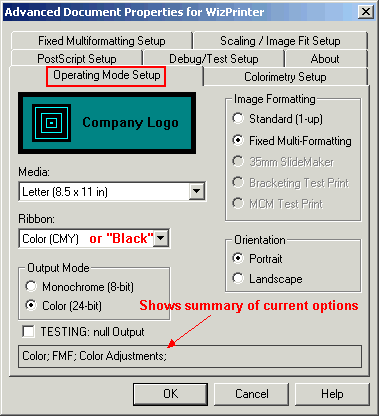
The small status box at the very bottom was visible on every tab, and it showed
a brief summary of the important selected options. Things like "color adjustments"
(which are not the default) are important to note so that the output will be
as intended by the medical professional.
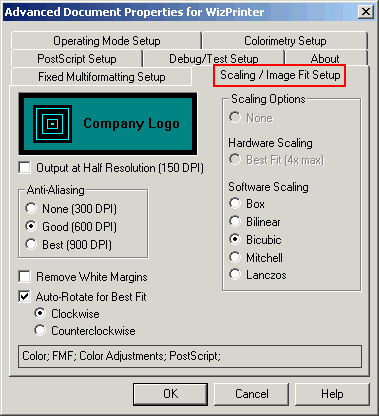
![]() Anti-Aliasing -
The printer was 300 DPI resolution, but the driver would present a
higher output resolution (600 or 900DPI) to the application and then perform
anti-aliasing down to the final 300DPI. This gave much better color output at the cost of
dramatically more memory and processing time (more than 200 megabyte in-core bitmaps).
Anti-Aliasing -
The printer was 300 DPI resolution, but the driver would present a
higher output resolution (600 or 900DPI) to the application and then perform
anti-aliasing down to the final 300DPI. This gave much better color output at the cost of
dramatically more memory and processing time (more than 200 megabyte in-core bitmaps).
![]() Software Scaling -
Several types of scaling were supported, all of which had subtly different tradeoffs
in processing time, image quality, and artifact production. I wasn't responsible for
the scaling algorithms themselves, only embedding them into the driver.
Software Scaling -
Several types of scaling were supported, all of which had subtly different tradeoffs
in processing time, image quality, and artifact production. I wasn't responsible for
the scaling algorithms themselves, only embedding them into the driver.
![]() Auto Rotation -
This option examined the image produced by the application determined
which orientation - portrait or
landscape - would allow the largest amount of the image to fit in the space
allotted on the output page. Rotation would be performed before scaling.
Additionally, any rectangular white margin could be removed before this
process, which allowed only the active part of the image to be considered.
Auto Rotation -
This option examined the image produced by the application determined
which orientation - portrait or
landscape - would allow the largest amount of the image to fit in the space
allotted on the output page. Rotation would be performed before scaling.
Additionally, any rectangular white margin could be removed before this
process, which allowed only the active part of the image to be considered.
![]() Half Resolution - for "draft" images or testing in low-memory
conditions, the driver would present a lower resolution output surface to
the application and do very simple box scaling (pixel replication) to send the
full 300 DPI bitmap to the print device.
Half Resolution - for "draft" images or testing in low-memory
conditions, the driver would present a lower resolution output surface to
the application and do very simple box scaling (pixel replication) to send the
full 300 DPI bitmap to the print device.
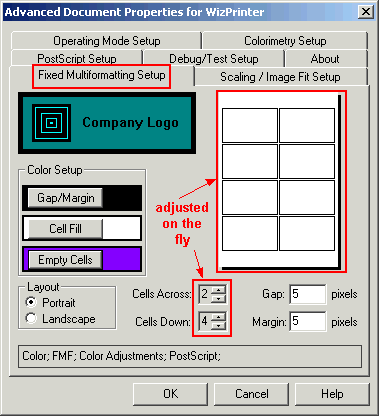
![]() Cell Matrix Orientation - The dimensions of the print matrix
was adjustible on the fly: selecting the size changed the pictoral representation
of the output page. Up to 9x9 images were supported, though in practice this
density was not often selected.
Cell Matrix Orientation - The dimensions of the print matrix
was adjustible on the fly: selecting the size changed the pictoral representation
of the output page. Up to 9x9 images were supported, though in practice this
density was not often selected.
![]() Gap/Margin Dimensions - The space between each cell, and the margin
between the cells and the edge of the paper was fully adjustible.
Gap/Margin Dimensions - The space between each cell, and the margin
between the cells and the edge of the paper was fully adjustible.
![]() Fill Color Selection - Three sets of colors were selectible by the
user: the fill for the gap/margin area (usually white); the color for filling
inside a cell beyond the active image area; and the fill color for cells left
empty due to an application not filling the entire page.
Fill Color Selection - Three sets of colors were selectible by the
user: the fill for the gap/margin area (usually white); the color for filling
inside a cell beyond the active image area; and the fill color for cells left
empty due to an application not filling the entire page.

The "Permit Additional Printer Gamma" and "Permit Additional Printer Contract" allowed
the printer's built-in hardware adjustments to be applied in addition to the adjustments
performed by the driver. Otherise the printer was instructed to null its default parameters
for the duration of the job.
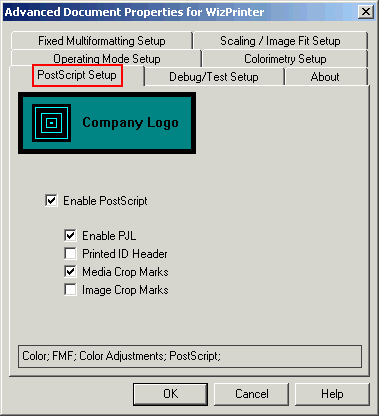
A few PostScript features were possible, including HP's Printer Job Language
image crop marks, and some identifying information printed as a header to show
the parameters used to produce the job. When producing dozens of pages of test
output while getting FMF to work, this was invaluable.
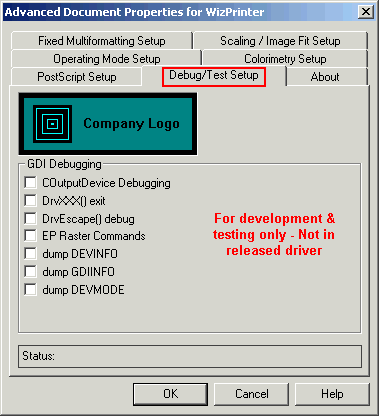
Because things like image scaling and color correction could be so tedious, a secondary "watchdog" thread was employed to look for job-cancel requests, and they would interrupt a (very slow) scaling operation in process. This was important to make the driver appear responsive to user requests.
So I developed what I call a "trampoline" DLL architecture: a small DLL that "looked" like a print driver and was actually installed into the system as the driver. Like all drivers, it remained in memory once loaded, but it knew nothing about printing. Instead, it dynamically loaded the "real" print driver when needed and unloaded it when finished. In effect, each print request "bounced" off of the trampoline DLL into the real driver, and because the real driver was unloaded, it could be replaced simply by copying a new one in place.
This approach took about three days to develop, but saved untold hours in avoiding uneccessary system rebooting.
In addition, we uncovered a bug in Windows NT itself: the OutputDebugString() operating system API function was failing in some cases because a key kernel object (the DBWinMutex mutex} was sometimes created with the wrong permissions. It seemed that the first program at system startup that called OutputDebugString() created this object, and it inherited the permissions from that first program. If the mutex was not accessible to other programs (due to restrictive permissions), no debugging output was possible.
I created a system service (the dbmutex service) that simply created this mutex with wide-open permissions, and since it was run early during boot time, all subsequent debugging output would be generated and captured properly. This was ultimately fixed by a Microsoft service pack, but we lost a lot of time figuring this out.